
As part of the EuRobot 2020 competition, we had to design a lighthouse that could rise by at least 70cm and rotate a light source.
Based on the dimensional constraints, we agreed that the best approach would be to design a scissor lift. We had limited access to a mill, which meant that we had to design the lighthouse in a way that was easy to build with common power tools. To achieve this goal, we used aluminum angles, aluminum extrusions, and brass rods which are easy to cut using a chop saw. Parts with difficult geometry were 3D printed in PETG for maximum durability (we did not have access to expensive printers capable of printing nylon, peek, or other high-temperature material).

We started the construction of the scissor lift by cutting the M5 threaded brass rods, 20mm aluminum angles, and 2020 extrusions to the length.


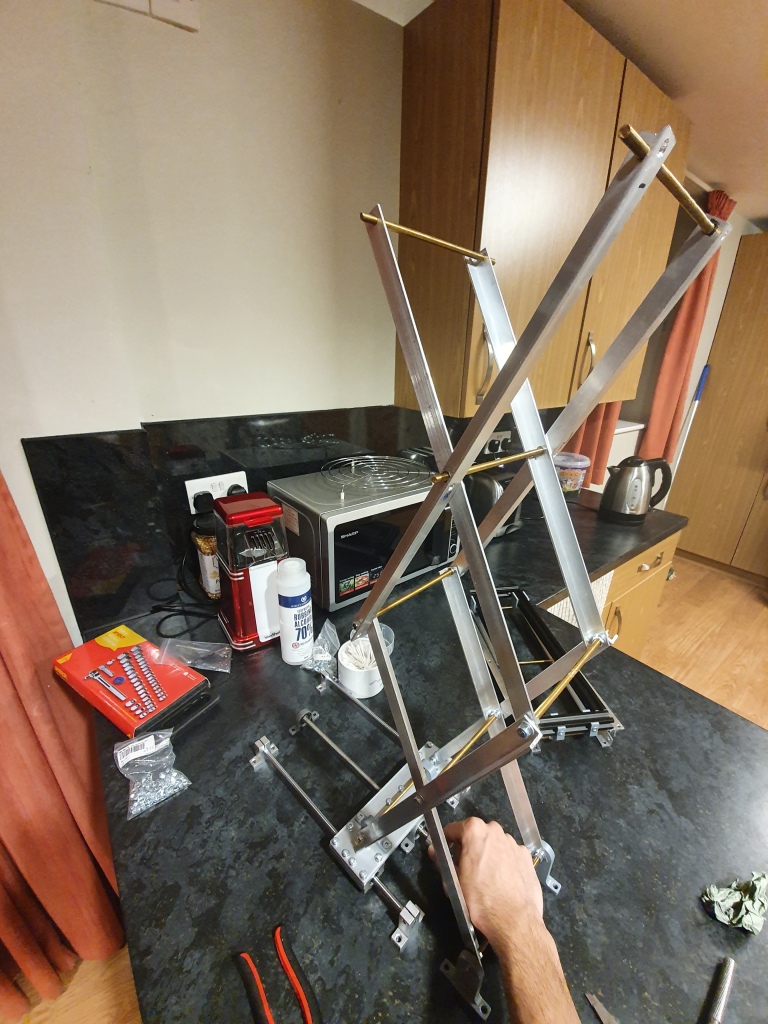


The 8mm steel rods, lead screw, and bearings were purchased as standard 3D printer parts as they are easy to source. Due to weight and friction, we had to choose a motor with fairly high torque (10 Nm) to turn the lead screw.
For the rotating light, we decided to have a fixed light source and a rotating cover that only lets light pass through 2 opposite sides. The light source was made by cutting some head-mounted LED lights to length

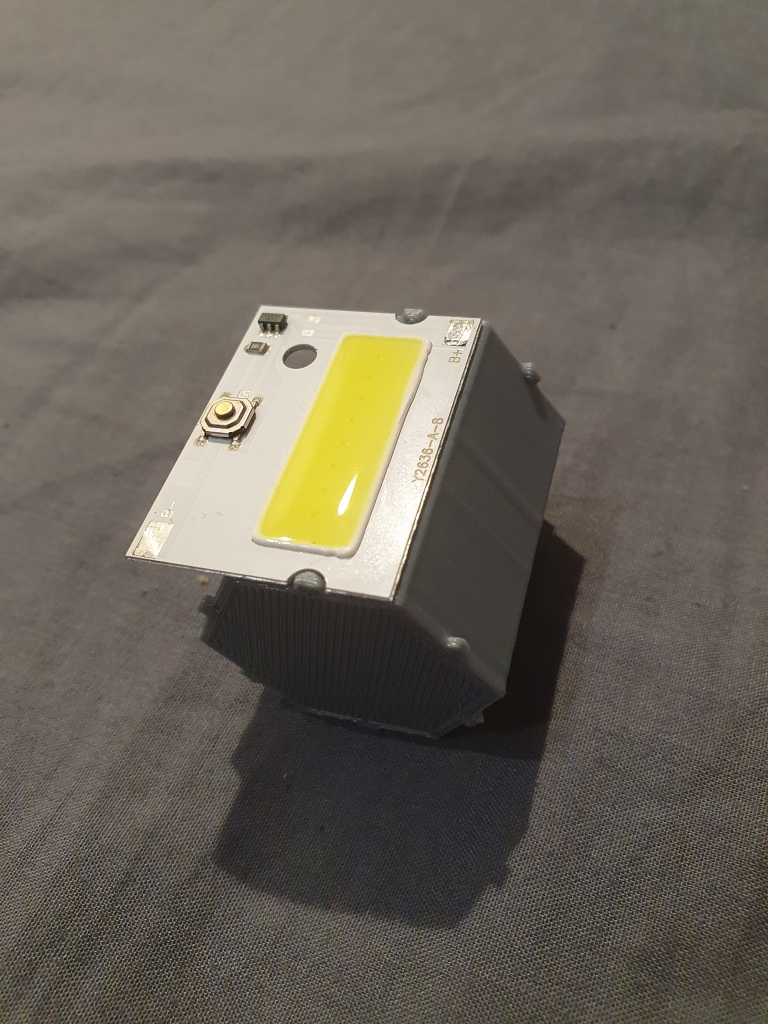


The 3S battery that we used had enough voltage to drive 2 COBs in series. We had 6 individual COB modules meaning we needed 3 drivers. I designed a constant current driver using the MCP6004 quad op-amp which gave us 4 output channels

The spinning cover was 3D printed and we used a small DC motor to rotate it
Finally, we put everything together

Leave a comment